Business.com aims to help business owners make informed decisions to support and grow their companies. We research and recommend products and services suitable for various business types, investing thousands of hours each year in this process.
As a business, we need to generate revenue to sustain our content. We have financial relationships with some companies we cover, earning commissions when readers purchase from our partners or share information about their needs. These relationships do not dictate our advice and recommendations. Our editorial team independently evaluates and recommends products and services based on their research and expertise. Learn more about our process and partners here.
There’s a lot to do when starting a business, but it doesn’t have to be overwhelming. This checklist will help you stay on top of the most important tasks.


This article is sponsored by Northwest Registered Agent.
Most new founders run into the same problem: the tasks required to launch a new business depend on each other, and doing them out of order creates extra work. Register a domain before you confirm the state will let you use the name, and you may end up with a web address that doesn’t match your legal entity. List your home address on a formation document, and it becomes a searchable public record you’ll need to file an amendment to change.
This checklist walks through the steps in the order a new owner should actually tackle them, from choosing a structure and filing with the state through the domain, email, phone number and website that make up your public-facing identity.
Two decisions determine everything else. The first is your business name, because it determines your domain, your email addresses, your signage and everything else you’ll eventually print. The second is your registered agent, because most states require you to designate one on the formation document itself rather than afterward.
From there, the dependencies run in a straight line. You can’t get an employer identification number tied to your entity until the state approves your formation documents. You can’t open a business bank account without an EIN. And you can’t accept customer payments cleanly until that account exists. Founders who start with the fun parts like designing the logo and building a website sometimes spend a week on branding for a name the state won’t let them register.
A business name has to clear three separate systems, and most new owners check them one at a time.
Start with your secretary of state’s business entity search. Every state maintains a searchable database of registered entities, and your proposed name has to be distinguishable from every name already on file there. Then, in the same sitting, check whether the matching domain is available. This is the step that saves the most rework: a name that clears your state’s registry may already be taken as a domain by a company two states over, and a name with a wide-open domain may be unavailable in your state’s records.
The third check is trademark. Search the U.S. Patent and Trademark Office’s trademark database for conflicting marks in your industry. Registering an entity with a state does not grant you trademark rights, and it won’t protect you if another company holds a federal mark on a similar name in a similar field.
If your first choice fails any of the three, move on to your second. Founders lose weeks trying to make a compromised name work.
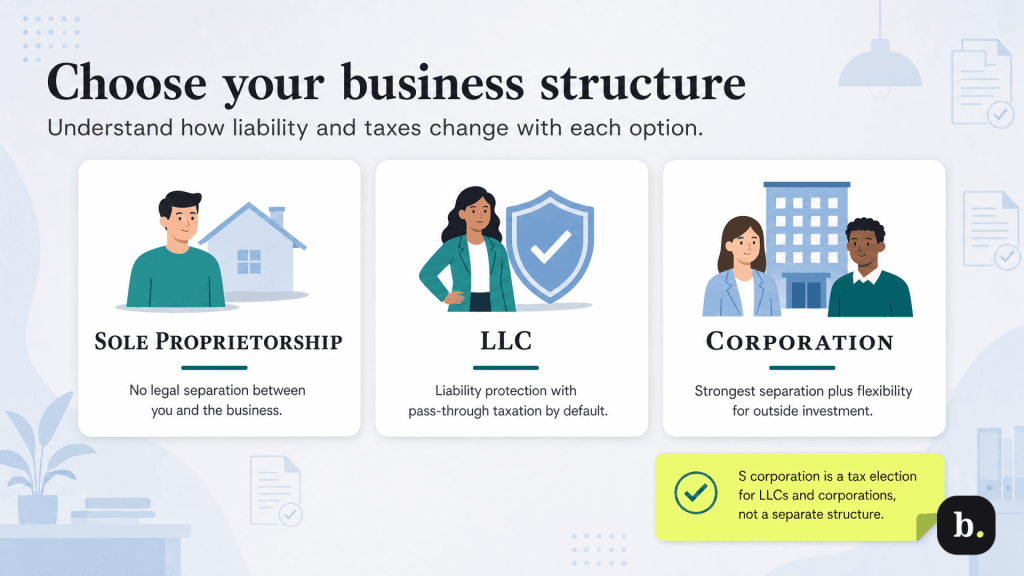
Your structure determines two things: whether your personal assets are exposed to business liabilities, and how your profits are taxed.
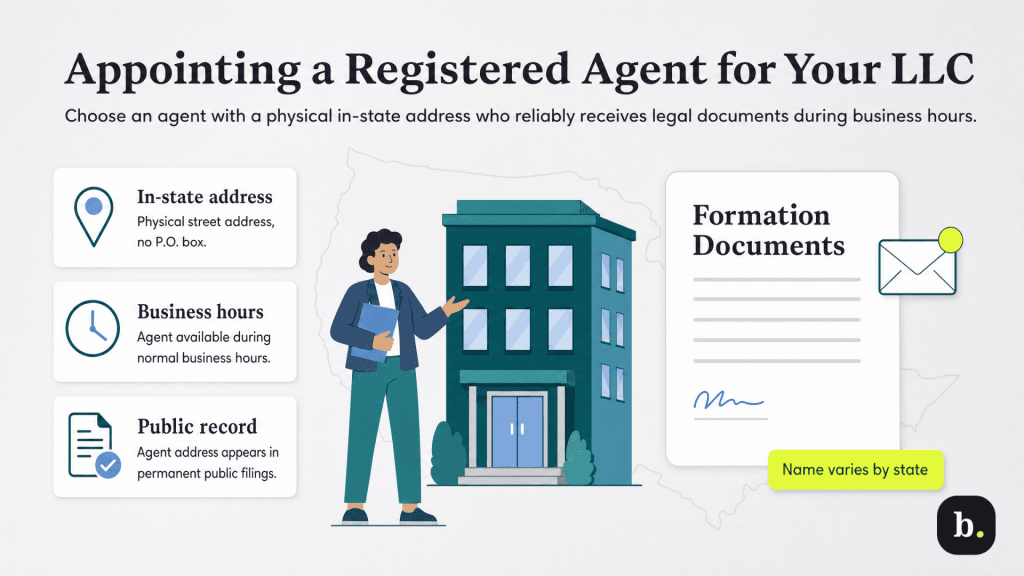
Every state requires an LLC, corporation or nonprofit to designate a registered agent on its formation documents. The agent is the party legally authorized to receive service of process (lawsuits, subpoenas and official state correspondence) on the business’s behalf.
The requirements are fairly consistent from state to state. Your agent needs a physical street address in the state, not a P.O. box. The agent has to be available at that address during normal business hours. And the agent has to consent to the appointment; several states, including Arizona, Connecticut, Florida, Kentucky, Louisiana, Maryland, Nevada, New Mexico, Washington and Wyoming, require a registered agent signature on your formation paperwork.
You are allowed to serve as your own agent in every state. The real question is whether you should. The agent’s address becomes part of the public record, permanently and searchably, which for a home-based business means publishing your home address. Serving as your own agent also means committing to be physically present at that address during business hours. Miss a service of process and a default judgment can be entered against your business before you know a lawsuit was filed.
A commercial registered agent addresses both problems by listing its own address on your filings and staffing that address full time. Northwest Registered Agent, for example, applies that address substitution by default rather than as a paid add-on, and scans documents in-house the day they arrive.
Once you have a cleared name and an appointed agent, you file. LLCs file articles of organization; corporations file articles of incorporation. The document goes to your secretary of state or the equivalent office, and it typically asks for your entity name, principal address, registered agent name and address, management structure and an organizer’s signature.
Filing fees and processing times vary widely by state, from under $100 to several hundred dollars and from same-day approval to several weeks. Most states offer expedited processing for an additional fee, which is worth paying only when you have a fixed deadline like a lease signing or a bank appointment.
Draft your operating agreement at the same time. Most states don’t require one, but banks frequently ask for it, and it’s the document that establishes ownership percentages, profit distribution, decision-making authority and what happens if a member leaves. Single-member LLCs need one too — it’s part of what demonstrates the entity is genuinely separate from you.
An employer identification number is your business’s federal tax ID. You need one to open a business bank account, hire employees and file business tax returns.
The IRS issues EINs at no charge through its online assistant, and the application takes roughly 15 minutes if you have your approved formation document in front of you. Apply after your entity is approved rather than before, so the EIN attaches to the correct legal name from the start. Plenty of services will file the SS-4 on your behalf for a fee.
Commingling personal and business money is the fastest way to undermine the liability protection you just filed for. If a court finds you treated the business account as an extension of your personal one, it can disregard the entity and reach your personal assets, which defeats the purpose of forming an LLC at all.
Banks generally ask for your filed formation document, your EIN confirmation letter, your operating agreement and a personal ID. Some also want a banking resolution authorizing you to open the account, which is standard for multi-member LLCs.
Open the account before you take your first payment. Depositing customer money into a personal account and transferring it later creates a record you’ll have to explain to your accountant, and potentially to a court.
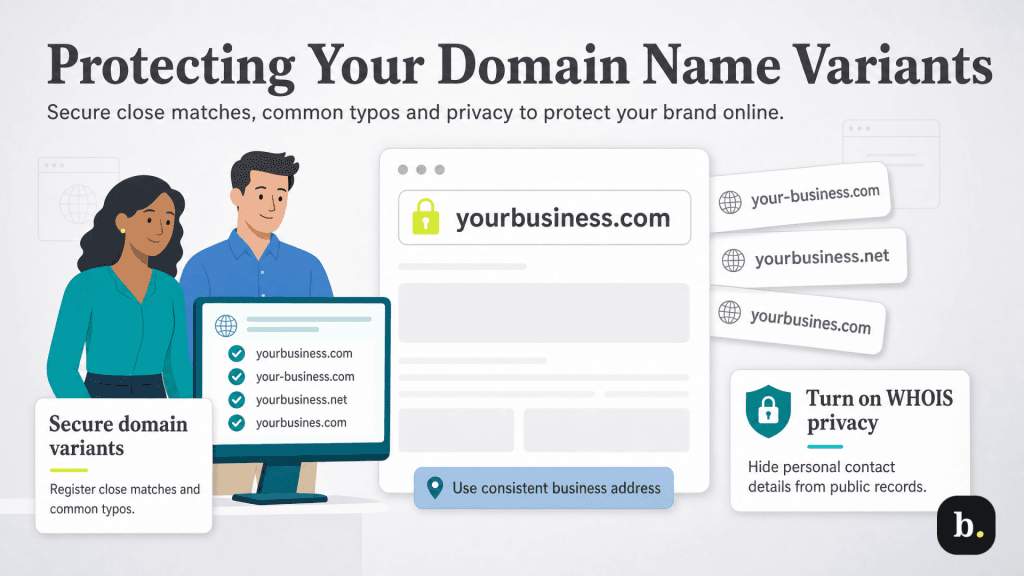
Register the domain that matches your legal or DBA name as closely as you can get it. Then register the obvious variants: the common misspelling, the hyphenated version, and the .net and .org if they’re inexpensive. This is defensive spending. It costs a few dollars a year and it keeps someone else from building a site at an address your customers will type by accident.
Turn on WHOIS privacy while you’re at it. Domain registration records are public, and without privacy protection your name, address, phone number and email get published in a database that spammers scrape continuously. Some registrars include the protection; others charge for it.
If you have a business address through your registered agent, use it in your domain records too. Consistency across public records matters more than it sounds; mismatched addresses raise avoidable questions during bank and vendor verification.
Once the domain is live, build your email on it. An address at your own domain signals a business that exists; a free webmail address on an invoice signals one that might not.
There’s a practical argument beyond credibility. Every account you create during setup (bank, payment processor, state filing portal, insurance carrier, software vendor) gets tied to whatever email address you use at the time. Start with a personal address and you’ll spend a day changing them later.
Set up role-based addresses from the beginning rather than only your own name. Something like info@ or support@ can be reassigned when you hire, and a separate billing address keeps invoices out of the same inbox as customer questions.
A dedicated business phone number does two jobs. It keeps your personal cell number off your public filings, your website, your Google listing and your marketing materials, where it will be harvested and dialed. And it lets you stop answering at 9 p.m.
You don’t need a full business phone system yet. A single forwarded number with voicemail is enough for a solo operation, and you can add extensions, call routing and a team later. What matters is that the number you publish now is one you can keep — changing a published number after customers and directories already have it is a real and recurring cost.
A single page with your services, service area, hours and contact information outperforms a “coming soon” placeholder immediately. Customers checking whether you’re real want to confirm three things: what you do, where you do it and how to reach you. Everything else can wait.
Claim your Google Business Profile in parallel, especially if you serve customers locally. It’s free, it feeds the map results and an unclaimed profile can display information you didn’t write and can’t correct.
Forming an entity registers your business with the state. It does not license you to operate. Licensing runs on three levels — state, county or city, and industry-specific — and the requirements vary enormously. Contractors, food service, childcare, health services, transportation and anything involving alcohol or firearms each carry their own requirements.
Nearly every state also requires LLCs and corporations to file an annual or biennial report, each with its own deadline and fee. Missing it costs you good standing with the state, and continued failure can lead to administrative dissolution, which means the state terminates your entity, along with the liability protection you formed it to get.
Set those reminders now, while the deadline is still in front of you.
Read back through steps 3 and 7 through 11 and count the vendors: a registered agent service, a domain registrar, an email host, a phone provider, a website builder and a mail service. That’s six accounts, six logins, six renewal dates and six separate places your personal information can end up published.
The fragmentation carries a real cost. Each vendor collects your name, address and phone number, and each has its own policy about what it does with them. A lapsed renewal at any one of them can take your email or your website offline with no warning you’d notice in time to prevent it.
Consolidating the identity layer under the same provider handling your state compliance addresses both problems. Northwest Registered Agent, for example, structures its service this way: registered agent service includes a domain name, website hosting, a business phone line, a business email address, a business address, mail scanning and brand protection, all managed from a single account and included for as long as the registered agent service stays active. Mail scanning covers up to five documents a year, and the company lists its own address on your public filings by default rather than yours. Email and website hosting are set up on the domain, so the domain comes first.
For a new owner, the practical benefit is sequencing. Steps 3 and 7 through 10 stop being five separate research projects and become one setup session, which means your domain, email address and phone number can be live the same week your formation documents are filed rather than a month later.
1. Clear your business name with the state, the domain registry and the USPTO trademark database, all in one sitting.
2. Choose a structure — for most new owners, this will be an LLC.
3. Appoint a registered agent, and decide whether you want your address on the public record.
4. File your articles of organization or incorporation, and draft an operating agreement.
5. Apply for your EIN free at IRS.gov once the state approves your entity.
6. Open a business bank account before you take your first payment.
7. Register your domain and its defensive variants, and turn on WHOIS privacy.
8. Set up email on your domain, including role-based addresses.
9. Get a business phone number you intend to keep.
10. Publish a one-page site and claim your Google Business Profile.
11. Confirm your licenses and put your annual report deadline on a calendar.
